I bet you’re a dog person, or at the very least pet friendly. And if you’re anything like me you love sharing stories about your dog — so much that your coworkers and friends might start to roll their eyes as soon as they hear Fido’s name. (that’s what happened to me at least)
If you’re looking for a fun creative outlet, or a way to share all your dog stories with the world starting a blog might be right for you. I started this blog a couple of years ago and it’s by far one of the best decisions I’ve ever made.
You Can Start Your Own Pet Blog in 10 Minutes or Less
Do you own your own pet sitting business, dog walking service or animal rescue? Would like to start a website to find new clients? Are you looking for a fun, creative outlet? Have you been looking at starting your own pet blog but didn’t know where to begin?
If so this guide I’ll show you how to:
- pick a domain name
- set up hosting
- get your site published with WordPress.
The blogging world is huge – and it can be extremely daunting when you’re starting out. I’ve put together a step by step guide on how I had Puppy Leaks up and running in 10 minutes. If you want to start your own pet blog you can make it happen today. Just follow these steps and you’ll have a live site in less than 10 minutes.
If you already have a blog check out part 2 for choosing the right theme, plugins & tools.
The Benefits of Starting Your Own Pet Blog
Before I started this blog a few years ago I was just looking for a creative outlet. I had messed around a little with HTML before, but had to real blogging experience. Little did I know how much of an impact starting my own blog would have on my life.
Whether you’re looking to help promote your business or just want your own creative outlet starting a blog has many benefits. Blogging has enabled me to start my own business, become a better writer and it helped me to find a productive way to use my creativity.
Step 1 – Choosing a Domain Name for Your Pet Blog
If you already know what you want to call your blog you can skip ahead to step 2.
If you’re having trouble thinking up a name for your blog check out Impossibility. It’s the most addicting domain name generator I’ve found that will help you come up with some interesting ideas. This is just for creating ideas; I wouldn’t recommend going with their hosting suggestions to the right.
Have fun with it – it comes up with some combinations that might spark an idea:
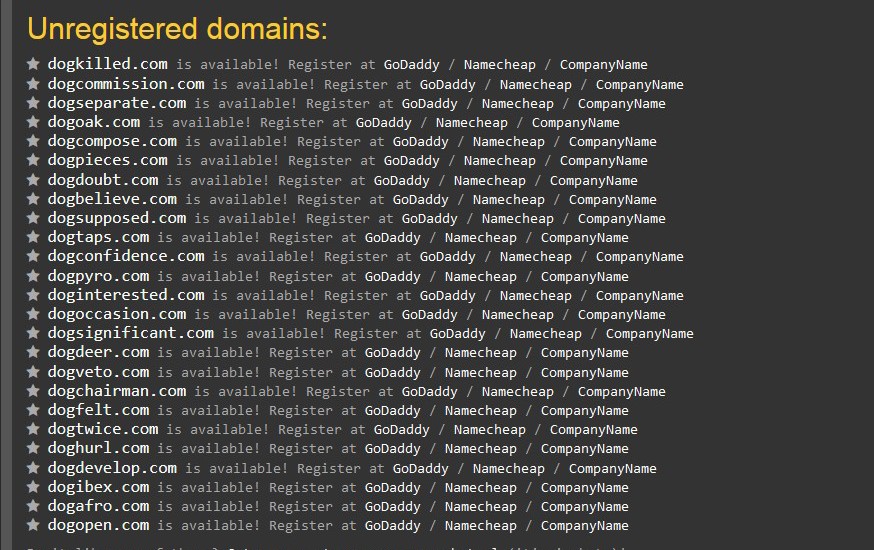
Dogpyro.com is available – now you can share all of our stories about your dog that loves to start fires.
If you’re looking for a more traditional domain search try Lean Domain Search where you can filter available domains by length, popularity, or alphabetical.
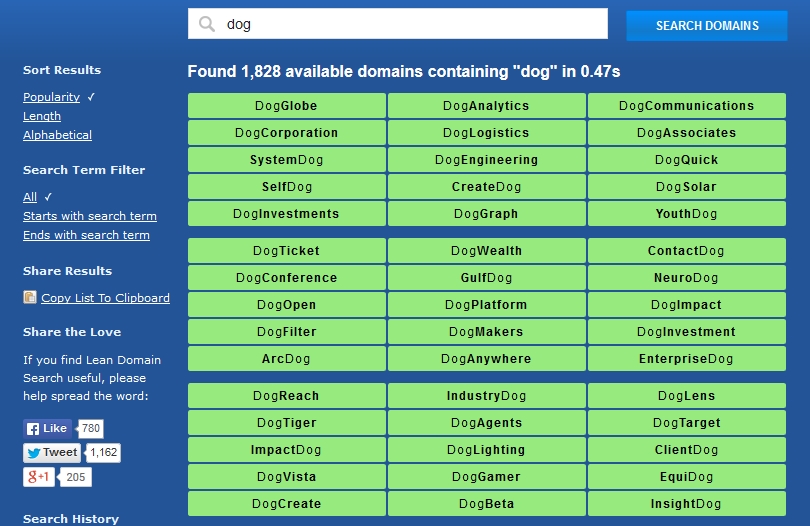
NeuroDog.com would be perfect for a blog about scientific studies. Just sayin’
Both of these tools are free and let you sort by length or popularity. I start by typing in a few words I had in mind (dog, puppy, canine) and see what’s available. Even if you don’t find your perfect domain name right away it’s a great way to get ideas flowing.
If you don’t know where to start when coming up with that perfect name I suggest checking out an online thesaurus. It can help you come up with a lot of words related to your niche. If you want to start a dog blog but all of your domains are already chosen you can try using pup, canine, pooch, or fido.
These are tools that search for .com domains; if you’re not picky about having a .com vs .biz etc you can find a lot more available domain names when it’s time to set up your hosting account.
Step 2 – Choosing Hosting For Your New Blog
There are a ton of hosting options available for a blog, but if you’re going with wordpress (like I did) Bluehost is a safe bet. They’re reliable, easy to use, and inexpensive compared to the competition. They have over 99% uptime; my site has only been down once in 10 months and it was for scheduled maintenance at 3am.
When you choose the 36 month shared hosting plan you’ll get a special price of $3.95 a month plus a free domain name for a year. You do have to pay one lump sum up front but in the long run it saves you a bunch of money.
If you’re not happy with their service they offer a 30 day money back guarantee. And if you decide after 10 months or 2 years that you don’t want your blog anymore you can cancel your hosting anytime & they’ll refund the difference.
Bluehost offers amazing support – and I can tell you this from experience. I’ve done some really stupid things with this blog and they’ve been able to help me every single time with no problem.
They have 24 hour support; so that one time I accidentally deleted my whole site (true story) they had it back in 10 minutes. And that includes the 2 minute wait on their support chat.
For those that like to comparison shop like myself check out this nifty chart of 9 popular hosting choices that PCmag has put together where you can compare what each service offers.
Step 3 – How to Set Up Your Hosting Account
Head on over to Bluehost to set up your hosting. After choosing “Get Started” you’ll see their available plans. I recommend going with the starter plan – it’s been excellent for my blog over the past year and I’m still using it.
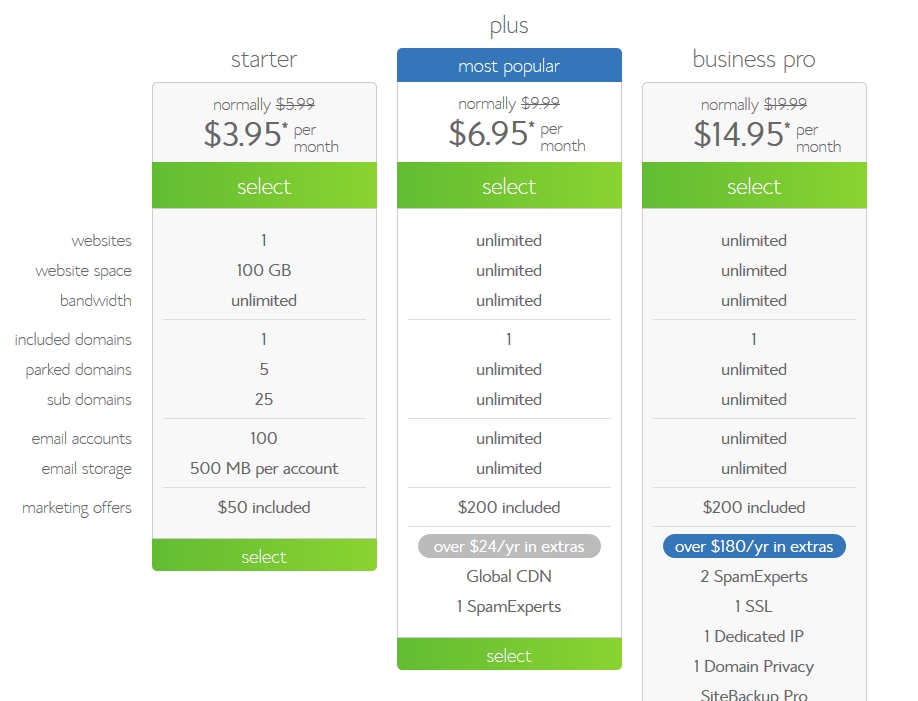
I recommend the starter plan.
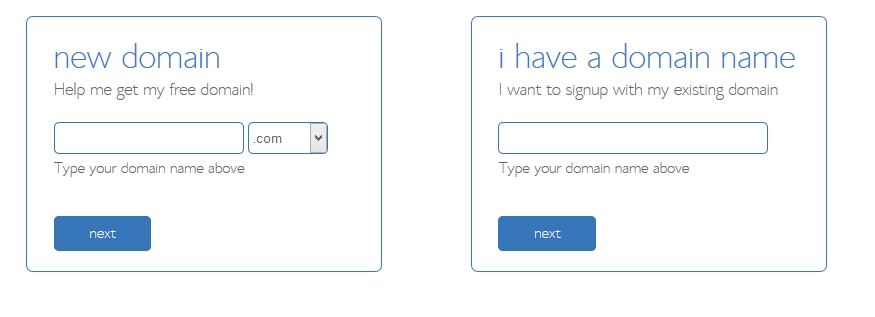
Now this is where you’ll be choosing your own domain name.
After entering in your information you’ll be given a few more optional hosting options. The only one I would highly recommend is domain privacy protection – I wouldn’t worry about any of the others for now. You can always go back pick additional options later.
The reason I’d opt for domain privacy protection is because when someone does a whois search on your blog it will show Bluehost’s information rather than youe own. I skipped this option when I first started this blog and then quickly went back and added it on when I realized it shows your full address & phone number to anyone who does a look up. (which by the way is public)
So if you want to avoid people having access to your name, phone number, and complete address I’d go with domain privacy.
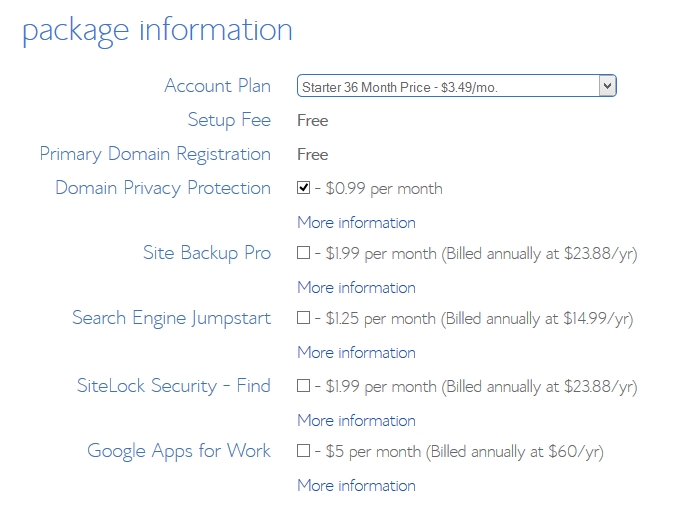
I’d opt for domain privacy – the rest are optional. (you can always edit this later from your Bluehost accout)
So you’ve done it; you’re done with setting up your hosting account. You can now say you’re the proud owner of your very own domain.
Step 4 – How to Install WordPress
Why I’ve chosen WordPress – WordPress is an amazing blogging platform; it’s free, easy to set up, and comes with hundreds of free themes to choose from when you’re starting out. With the addition of the MOJO Marketplace to your Bluehost account this step is amazingly easy.
The first step is to close the pop-up that offers to help you start your blog – I’ll show you how to do it the easy way.
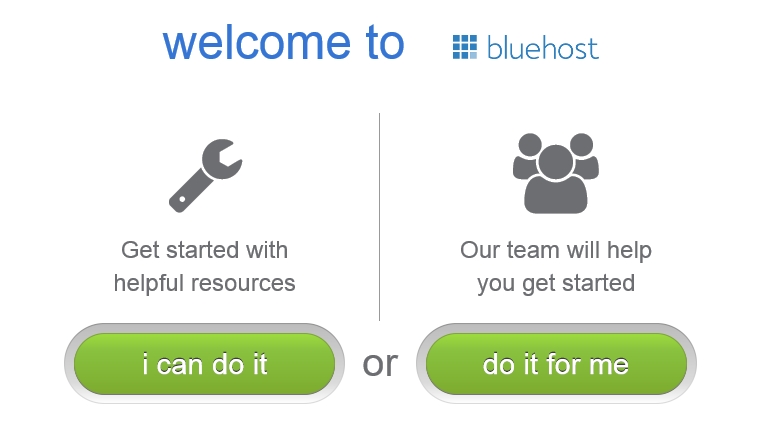
Close this popup.
So this is your Bluehost control panel and you’re probably a bit overwhelmed by so many buttons. For now we’re just focusing on getting WordPress installed so look down at the third row of icons. Under the website options in your account you’ll click on “Install WordPress:”
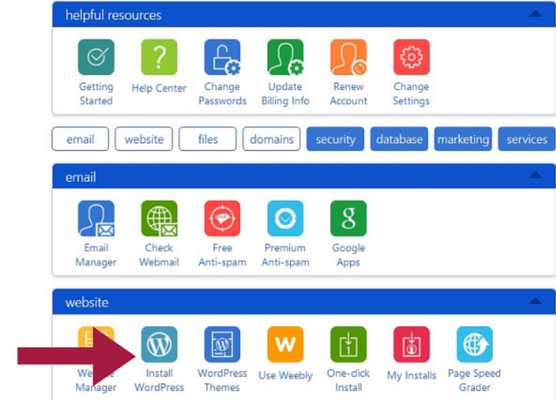
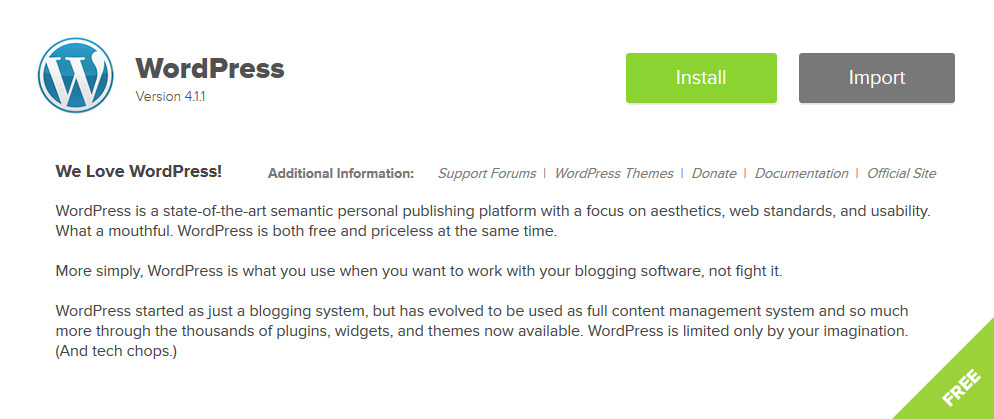
After choosing Install WordPress you’re going to click on the green install button:
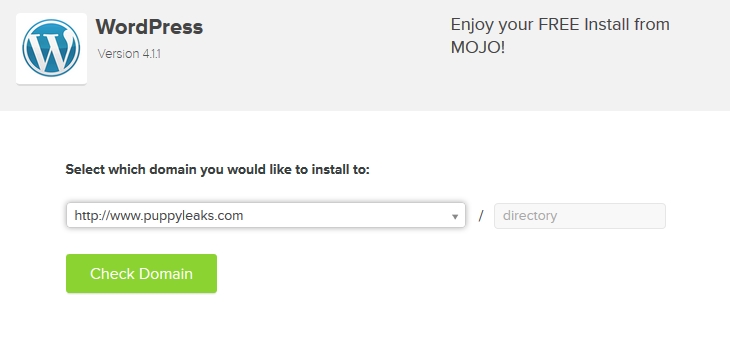
Your domain name should already be filled out here – just leave the directory part blank & hit check domain.
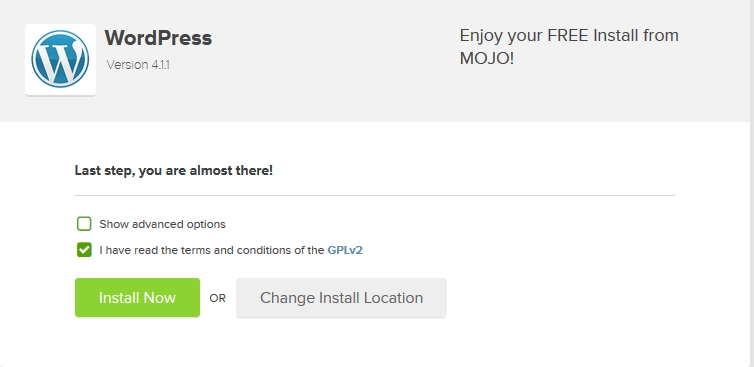
Now you’re ready to begin the installation process by hitting install now:
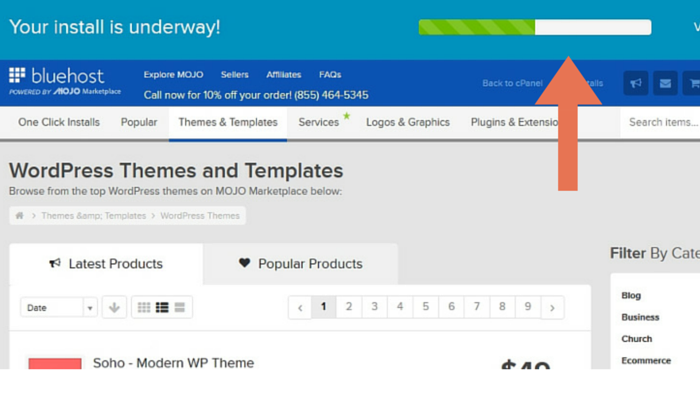
The installation itself will only take a minute or two; just wait for the progress bar at the top to finish. You can browse around the Mojo Marketplace and look at some of their pretty themes (they’re premium so they’re not free).
I wouldn’t recommend buying any themes right away. WordPress offers a ton of great looking free ones to get started with. After you’re more comfortable with navigating around WordPress and how themes work you can check out my guide on how to choose the right themes & plugins for your blog.
Ok so once it’s done downloading you’ll click the “View Credentials” button.
View credentials which will bring you to this screen:

This is your WordPress name, admin login, and password – keep these handy or jot them down. Next you’re going to log into WordPress by using the admin URL provided. Make sure to bookmark that link or take note of it, that’s how you’re going to be logging into your blog from now on. Using the above credentials you’re going to log into WordPress: 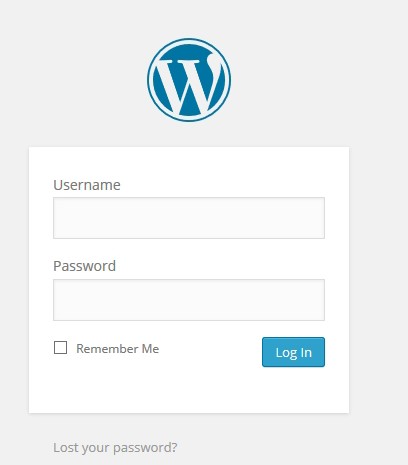
Now you’re officially logged into your blog and can start deciding on what your blog is going to look like, and what sorts of content you’re going to publish.
If you’ve followed along so far congrats – you’ve got yourself a brand new blog. Now if you’re ready let’s move onto Part 2: Choosing Your Theme, Plugins & Tools for your new blog.
Take a little bit to get comfortable with the WordPress dashboard – you’re going to be seeing a lot of it. It seems overwhelming at first but once you know the basics of your dashboard it will get much easier. Check out these great guides to help you familiarize yourself with WordPress:
Recommended Reading:
- WordPress Tutorial: A Guide for Beginners – Great step by step guide
- WordPress Dashboard Support – Basic guide to the dashboards functions
- How to Use the WordPress Dashboard – Guides on getting started with WordPress
- Choosing the Right Blogging Platform – 2015 Comparison
This post contains affiliate links, if you make a purchase I’ll earn a small commission.